comment [336]
- From trax on 10-09-2012 at 08:06:45
Ako kazes da si prije pravio dimmere i da su radili bez problema, onda ti je vjerovatna losa
serija neke komponente koju sada koristis! Probaj mijenjati redom dok ne proradi.
IP: n/a
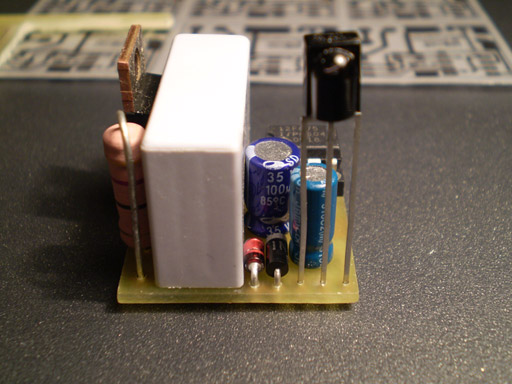
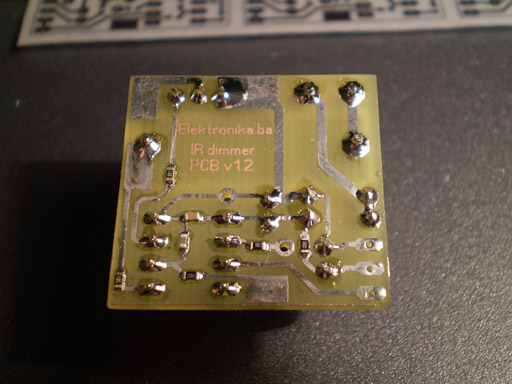
This is a very simple IR light dimmer that you will wish to have sooner or later, especially those who are lazy enough to get up and turn off the lights. There are two versions of PCB for two sizes of capacitors, so PCBs are: 32.5 x 26.5mm and 28.5 x 27mm.
You can download the project files at the bottom of this page by clicking on red "download" button.

Features of current beta version of firmware:
- Soft start (gradually turning on the light bulb)
- Soft down (gradually turning off the light bulb)
- Learning IR codes from RC5 and NEC remotes
- Dimming in 10 levels by using only IR remote
- Previous dimm-level remembering when operating with remote
- Sleep timer in duration of 1.6min for 60Hz version and 2min for 50Hz version
- ON/OFF control with wall pushbutton
Dimmer is connected to existing home wiring installation inside a junction box, which is usually located above the light switch. In order to properly connect the dimmer to installation one should follow the schematics provided for that purpose. If connected differently there is a very big chance of some freaky side effects such as burned PIC microcontroller, serious fire and who knows what else.
Learning remote control IR codes (programming procedure)
After connecting dimmer to installation you must program the remote control buttons. Here is how to do that:
1. Hold the wall pushbutton for 11 sec so that dimmer can enter programming mode. After those 11 sec, LED will start to blink fast, and light will dimm to third (3.) level. Now you have 11 sec to complete the programming sequence:
2. Press the first button on your remote that will increase light level or turn on the light when it is turned off (ON/UP)
3. Press the second button on your remote that will be used to decrease the light level (DOWN)
4. Press the third button that will be used for activating/deactivating sleep mode (SLEEP)
5. Finally, press the fourth button that will be used to turn off light completely (OFF)
During programming, both the light bulb and LED will blink to confirm IR code reception. If your remote control does not have all 4 buttons that you can use, you can repeat previous button but that will cancel out some features. For example, if your remote has only two buttons (A and B), and if during programming you press: A A A B, that means that key A will be used for ON/UP function, and key B will be used to completely turn off the light. If you choose combination A B B B, it means that the key A will be again used for ON/UP function, and key B will be used to decrease light level (it will also turn the light off completely in 10 button presses - until zero level).
Programming notice: If during programming, you notice that LED blinks even when you don't press any buttons on your remote control, it is probably because you used TSOP11xx instead of TSOP17xx receiver module. In that case, you will probably not be able to program your dimmer properly.
If you are not satisfied with your choice of remote controller buttons, you can repeat the learning procedure as much as you like.
If you are planning to use your TV's remote controller, you should probably choose those teletext buttons: red, green, yellow and blue to avoid, for example, switching channels when operating the dimmer.
Sleep timer
Sleep timer can be activated by a bit longer wall-pushbutton press, more than 1.8 sec to be precise, or by pressing the appropriate button on the remote controller. Sleep timer cancellation is accomplished just like the activation. It is possible to increase/decrease the light level when sleep timer is active. Dimmer will automatically set the light level to six (6) when entering the sleep mode, but only if previous level was greater than 6.

Important notice: This device is connected to mains power line, so it requires a lot of respect. If you are not sure in what you are doing, you better leave the installation part to the experienced electrician.
Dimmer in operation:
Note: Dimmer works better with TIC206 rather than TIC216!
Author (sent by): Trax
Download counter: 55,395
Rating: 

 (3.00, votes 8291)
Date: 07-02-2009
Lokalna verzija ove stranice: IR dimmer svjetla v1
Kupicu danas pa proveriti.
Nego, da li ja mogu sa ovim da dimujem led osvetljenje na 220, bez trafoa, znam da ne moze biti
induktivni load... I jel moze da se prevazidje to nekako, da moze da se kontrolise trafo?
Znam da je bilo da ne moze zbog nedovoljne struje sa pica na gejt neki drugi trijak, jel
nadjeno resenje u medjuvremenu?
IP: 89.216.193.140
Ako kazes da si prije pravio dimmere i da su radili bez problema, onda ti je vjerovatna losa
serija neke komponente koju sada koristis! Probaj mijenjati redom dok ne proradi.
IP: n/a
Spam neki, ne mogu da obrisenm, ne znam... Izvinjavam se. Nego, ako izvadim pic, i spojim +5V
na gejt preko 820 oma, na izlazu treba da dobijem pun sjaj, tj. 230V, jel tako? Ali ne, dobijam
oko 130... Da nije losa serija trijaka, posto se sva tri isto ponasaju, da probam sa manjim
otporom? Ne kontam dalje... 5V bi moralo da ga otvori, po semi...
IP: 89.216.193.140
Sve spojeno kako treba. Trijak testiran posebno, ok. Napravio jos jedan, apsolutno identicno se
ponasa. Nemoguce da na dva uredjaja pogresim isto. Programiran pic sa 50Hz hexom. 5V na
napajanju pica, 4.8V na izlazu pina 7, pre 820R. Kada se ukljuci.
Na trijaku 1 je napajanje, 2 izlaz, 3 gejt. Ne pravim ga prvi put, pravio sam i ranije bez
problema, 3 komada.
Ne vidim problem... Jedino da 3 trijaka nisu ispravna, neispravna serija ili nesto, mada su
testirani u 12V krugu.
I jos, nevezano... Ovaj trijak n
IP: 89.216.193.140
Dom, provjeri da li si sve spojio kako treba! Ako su ti sve komponente OK onda si sigurno nesto
pogresno spojio. Mozda si iprogramirao HEX za 60Hz greskom??
IP: n/a
Pozdrav. Napravio sam dimer, ali imam problem Sve radi ok, ali na sijalici kada se ukljuci
dobijem oko 130V maksimum. Sve komponente su ispitane, probao sam sa drugim picem, napon na
pinu 7 je 4.8V kada je ukljuceno, pre 820oma, probao drugi trijak, sve probao, 4.92v na
napajanju pica, ne znam gde da gledam vise... Ideja neka?
Ah dam i sijalica nekako treperi sitno, ali primetim... kao da je na 23-30hz... Eto, nadam se
da sam ok objasnio...
IP: 89.216.194.122
For Brazil, use 220V schematics and 60Hz HEX file.
IP: n/a
Hi, I´m at Brazil and here my area is 220V/60Hz what the value for r1 and c1 can i use?
IP: n/a
Da li mi neko moze poslati stampanu plocicu koja nema SMD komponente jer ne mogu nigdje da
nadjem na netu? Hvala!!!
IP: 109.165.246.209
Konecno procitao svi komentari, Izrabotio sam dimmer i radi perfektno bravo za trax, i sakam da
dodadam optokapler neznam kako da ga povrzam, so kolkav otpor na anoda ikoko se priklucuva na
tiristor, dali e potrebno da se promeni tiristor?
fala odnapred
pozdrav od makedonija
IP: n/a
You can log-in on forum link: Login page. After logging-in, return to this page and click refresh in your browser.