comment [86]
- From slaki84 on 30-01-2010 at 18:05:49
zasto nemogu da upisem ovaj program na pic? izbacuje mi neku gresku!
probao sam sa dva pica i na oba mi javlja istu gresku! pomagajte imam jos jedan pic i imam
zelju da napravim dimer :)
IP: n/a
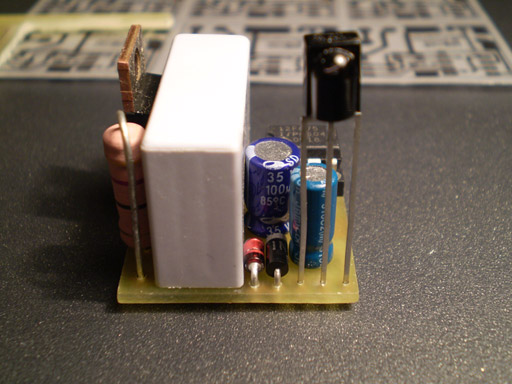
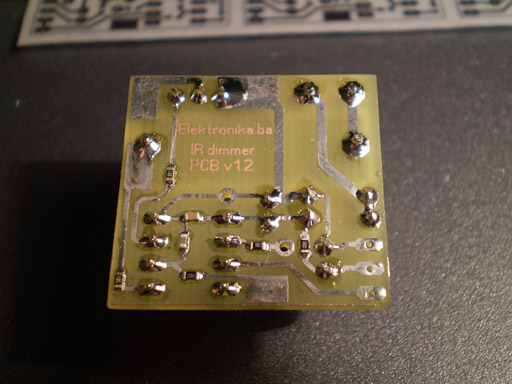
This is a very simple IR light dimmer that you will wish to have sooner or later, especially those who are lazy enough to get up and turn off the lights. There are two versions of PCB for two sizes of capacitors, so PCBs are: 32.5 x 26.5mm and 28.5 x 27mm.
You can download the project files at the bottom of this page by clicking on red "download" button.

Features of current beta version of firmware:
- Soft start (gradually turning on the light bulb)
- Soft down (gradually turning off the light bulb)
- Learning IR codes from RC5 and NEC remotes
- Dimming in 10 levels by using only IR remote
- Previous dimm-level remembering when operating with remote
- Sleep timer in duration of 1.6min for 60Hz version and 2min for 50Hz version
- ON/OFF control with wall pushbutton
Dimmer is connected to existing home wiring installation inside a junction box, which is usually located above the light switch. In order to properly connect the dimmer to installation one should follow the schematics provided for that purpose. If connected differently there is a very big chance of some freaky side effects such as burned PIC microcontroller, serious fire and who knows what else.
Learning remote control IR codes (programming procedure)
After connecting dimmer to installation you must program the remote control buttons. Here is how to do that:
1. Hold the wall pushbutton for 11 sec so that dimmer can enter programming mode. After those 11 sec, LED will start to blink fast, and light will dimm to third (3.) level. Now you have 11 sec to complete the programming sequence:
2. Press the first button on your remote that will increase light level or turn on the light when it is turned off (ON/UP)
3. Press the second button on your remote that will be used to decrease the light level (DOWN)
4. Press the third button that will be used for activating/deactivating sleep mode (SLEEP)
5. Finally, press the fourth button that will be used to turn off light completely (OFF)
During programming, both the light bulb and LED will blink to confirm IR code reception. If your remote control does not have all 4 buttons that you can use, you can repeat previous button but that will cancel out some features. For example, if your remote has only two buttons (A and B), and if during programming you press: A A A B, that means that key A will be used for ON/UP function, and key B will be used to completely turn off the light. If you choose combination A B B B, it means that the key A will be again used for ON/UP function, and key B will be used to decrease light level (it will also turn the light off completely in 10 button presses - until zero level).
Programming notice: If during programming, you notice that LED blinks even when you don't press any buttons on your remote control, it is probably because you used TSOP11xx instead of TSOP17xx receiver module. In that case, you will probably not be able to program your dimmer properly.
If you are not satisfied with your choice of remote controller buttons, you can repeat the learning procedure as much as you like.
If you are planning to use your TV's remote controller, you should probably choose those teletext buttons: red, green, yellow and blue to avoid, for example, switching channels when operating the dimmer.
Sleep timer
Sleep timer can be activated by a bit longer wall-pushbutton press, more than 1.8 sec to be precise, or by pressing the appropriate button on the remote controller. Sleep timer cancellation is accomplished just like the activation. It is possible to increase/decrease the light level when sleep timer is active. Dimmer will automatically set the light level to six (6) when entering the sleep mode, but only if previous level was greater than 6.

Important notice: This device is connected to mains power line, so it requires a lot of respect. If you are not sure in what you are doing, you better leave the installation part to the experienced electrician.
Dimmer in operation:
Note: Dimmer works better with TIC206 rather than TIC216!
Author (sent by): Trax
Download counter: 55,370
Rating: 

 (3.00, votes 8238)
Date: 07-02-2009
Lokalna verzija ove stranice: IR dimmer svjetla v1
Nije ti programator OK ili su ti PIC-evi neispravni... Tvoj problem nema veze sa dimmerom i
HEX-om.
IP: n/a
zasto nemogu da upisem ovaj program na pic? izbacuje mi neku gresku!
probao sam sa dva pica i na oba mi javlja istu gresku! pomagajte imam jos jedan pic i imam
zelju da napravim dimer :)
IP: n/a
Svaki negativan komentar ili raznorazna pitanja oko neispravnosti uredjaja su totalno
nepotrebna! Uredjaj radi vrhunski, ako se sve normalno spoji, naravno. Ja ga koristim vec dva
meseca bez ikakvih problema (u pocetku je bilo problma ali ja sam bio kriv jer sam zamenio
delove). Znaci svaka cast majstore, vrh si i necemo da te menjamo...:-)!!!
IP: n/a
Iz nekog cudnog razloga nisam u stanju nekih 24h ostaviti post... da probam opet.
Problem je bio falican 100omski otpor na kolu tastera. Sad je sve OK. Stvar je odlicna.Svaka ti
dala!
pozdrav iz Bijeljine
IP: 94.250.82.131
oce se moci zalemiti 1206 smd-i na ovu tvoju shemu?
IP: 83.131.76.116
Koristio sam 0603 SMD komponente.
A za @misley: pronadji jos gresaka koje si napravio i bice sve OK :)
IP: n/a
@ trax koje smd-e si koristio 603, 805,1206?
IP: 78.1.7.240
Opet ja...jesam malo dosadan?
elem, ono sto je vidljivo od gresaka upraćeno je zamjena + i Data nožica na TSOP-u.
Iskorigujem ja to i sta imam sad-LED blinka na bilo koju komandu na Samsung daljincu (mogu da
primijetim da je prijemnik VRLO osjetljiv) ali i dalje ne mogu da dodjem do moda za
programiranje???
IP: 94.250.116.181
You can log-in on forum link: Login page. After logging-in, return to this page and click refresh in your browser.